
Key Takeaways
- Built-in ovens provide a streamlined appearance, flexible kitchen placement, and cooking features designed for modern homes.
- Most built-in oven problems involve heating components, temperature sensors, door hardware, convection systems, or electronic controls.
- Simple checks involving power, settings, airflow, and door closure can help identify the source of an oven problem.
- Using the appliance model number is the most reliable way to locate a compatible OEM replacement part.
- Routine cleaning, careful use, and early attention to performance changes can extend the service life of a built-in oven.
Introduction
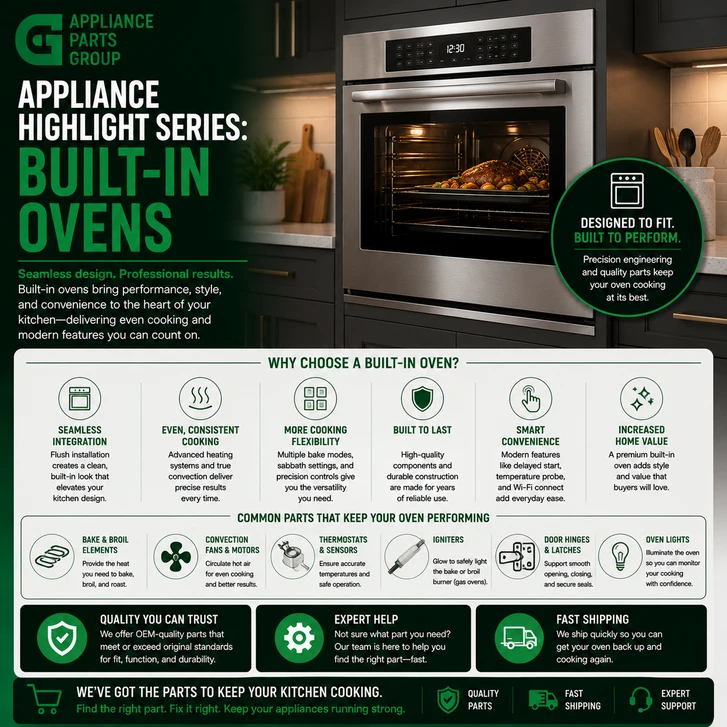
Built-in ovens have become a popular choice for homeowners who want a clean, integrated kitchen design without sacrificing cooking capacity or performance. Unlike a freestanding range, a built-in oven is installed directly into surrounding cabinetry. This arrangement allows the oven to be positioned at a comfortable height and gives homeowners greater flexibility when choosing a separate cooktop.
Built-in models are commonly called wall ovens, although not every installation is located in a wall. They may be installed in a tall cabinet, below a counter, or as part of a double-oven configuration. Available designs include electric ovens, gas ovens, microwave-and-oven combinations, steam-assisted models, and convection ovens with one or more circulating fans.
Although their appearance can be sophisticated, built-in ovens rely on many of the same fundamental parts found in other cooking appliances. Heating elements or gas burners create heat, sensors monitor temperature, controls regulate the cooking cycle, and door components help retain heat inside the oven cavity. Understanding these systems can make it easier to recognize a developing problem and determine whether a part may need service or replacement.
What Is a Built-In Oven?
A built-in oven is a cooking appliance designed to be installed within kitchen cabinetry rather than standing independently on the floor. Because the oven does not include an attached cooktop, homeowners can place the cooking surface elsewhere in the kitchen. This flexibility can improve workflow and make it easier to design cooking areas around personal preferences.
Built-in ovens are usually available in standard cabinet widths, with 24-inch, 27-inch, and 30-inch models being common in residential kitchens. Actual dimensions vary by brand and model, so cabinet openings must be measured carefully before installation or replacement. Even ovens with the same advertised width may have different cutout, ventilation, electrical, or gas requirements.
Why Homeowners Choose Built-In Ovens
One of the main benefits of a built-in oven is its placement. Installing the appliance higher in the cabinetry can reduce bending when loading food, checking a roast, or removing a heavy pan. This can make daily cooking more comfortable and improve accessibility for some users.
Built-in ovens also support a coordinated kitchen layout. A wall oven can be paired with a gas, electric, or induction cooktop, allowing the homeowner to select each appliance independently. Double ovens provide two separate cavities, making it possible to cook foods at different temperatures at the same time.
Depending on the model, available features may include true convection cooking, air-fry modes, temperature probes, steam assistance, self-cleaning cycles, delayed cooking, remote monitoring, and touch-screen controls. These features increase convenience, but they can also introduce additional components that may eventually require maintenance or replacement.
How a Built-In Oven Works
During a standard bake cycle, an electric built-in oven primarily uses the bake element near the bottom of the cavity. The broil element at the top may cycle periodically to help maintain a balanced temperature. In a gas oven, the control system opens a gas valve after the igniter reaches the required operating condition.
A temperature sensor or thermostat monitors the heat inside the cavity. The electronic control board compares the sensed temperature with the selected setting and cycles the heating system on and off. Small temperature changes during this process are normal because ovens do not maintain one perfectly fixed temperature every second of the cooking cycle.
Convection models use a fan to circulate heated air around the food. Some ovens have a dedicated heating element around the convection fan, while others use the fan with the standard bake and broil elements. Moving air can promote even browning and may reduce cooking time for certain recipes.
Common Built-In Oven Problems
The Oven Does Not Heat
An oven that does not heat may have a power-supply problem, failed heating element, damaged igniter, open thermal fuse, defective temperature control, or electronic control issue. Electric ovens often require a 240-volt supply. A display or oven light may still operate when one side of the electrical circuit has been interrupted, so partial operation does not always confirm that the oven is receiving the power needed for heating.
The Oven Heats Slowly
Long preheat times may result from a weak bake element, aging gas igniter, incorrect operating mode, damaged door gasket, or voltage problem. Some newer ovens use controlled preheating patterns that differ from older models, but a significant change from the appliance’s normal performance should be investigated.
Food Cooks Unevenly
Uneven cooking can be caused by incorrect rack position, overcrowding, restricted airflow, damaged bake or broil elements, a failed convection fan, or an inaccurate temperature sensor. Dark pans, reflective pans, and oversized baking sheets can also affect cooking results.
The Oven Temperature Is Inaccurate
A small difference between the selected setting and a thermometer reading may be normal, especially when the measurement is taken during only one part of the heating cycle. Persistent overcooking or undercooking may indicate a sensor, thermostat, control, calibration, or airflow problem.
The Oven Door Does Not Close Properly
Worn hinges, damaged hinge receivers, bent door components, loose hardware, or a displaced gasket can prevent the door from sealing. A poorly closed door allows heat to escape, increases cooking time, and may expose nearby cabinetry or controls to excessive heat.
The Convection Fan Is Noisy or Does Not Run
A convection fan may make unusual sounds when its blade is loose, obstructed, or rubbing against a cover. The fan motor can also wear over time. Some ovens intentionally cycle the fan on and off, so the owner’s manual should be consulted before assuming that intermittent operation indicates a failure.
The Display or Controls Do Not Respond
Unresponsive controls may be related to control lock settings, a tripped breaker, loose wiring, moisture near the interface, a damaged touch panel, or a failed electronic control board. Power interruptions can also cause the clock to flash or require the oven to be reset before it will operate.
Step-by-Step Troubleshooting
- Identify the exact symptom.
Determine whether the oven is completely unresponsive, powers on without heating, heats unevenly, displays an error code, or has a mechanical problem such as a door that will not close.
- Check the oven settings.
Confirm that control lock, Sabbath mode, delayed start, demo mode, or another special setting is not preventing normal operation. Refer to the owner’s manual for model-specific instructions.
- Verify the power supply.
Check the household breaker or fuse panel. Many electric built-in ovens use a double-pole breaker. Resetting a breaker repeatedly is not a repair; a breaker that continues to trip should be evaluated by a qualified professional.
- Look for an error code.
Record the complete code before disconnecting power. Error-code meanings vary by manufacturer and model, so use the appliance documentation rather than assuming that one code has the same meaning across all brands.
- Inspect the oven cavity.
After the oven is cool and power has been disconnected, look for a visibly blistered, cracked, or separated heating element. Also inspect the fan cover, racks, gasket, and interior panels for obvious damage or obstruction.
- Check the door closure.
Open and close the door slowly. Look for uneven movement, resistance, looseness, or gaps around the gasket. Do not force a door that appears misaligned.
- Evaluate cooking performance.
Test the oven with the recommended rack position and a typical load. Avoid covering racks or the oven floor with foil, since doing so can disrupt airflow and damage oven surfaces.
- Confirm part compatibility before replacement.
Locate the full appliance model number and compare it with the replacement part listing. Similar-looking components may have different electrical ratings, connectors, mounting points, or software requirements.
- Use professional service when necessary.
Built-in ovens may involve high voltage, high temperatures, gas connections, heavy door assemblies, and sharp cabinet edges. Contact a qualified technician when testing requires live voltage, gas-system work, extensive disassembly, or specialized diagnostic equipment.
Common Parts That May Need Replacement
Bake Element
The bake element supplies much of the heat used during conventional baking in an electric oven. A failed element may show visible cracking or blistering, but internal failures are not always visible. Compatibility should be confirmed by model number and electrical specifications.
Broil Element
The broil element provides intense heat from the top of the cavity. It may also operate during preheating or selected baking cycles. A failed broil element can affect browning, broiling performance, and preheat time.
Oven Igniter
In many gas ovens, the igniter must become hot enough to allow the safety valve to open. An igniter can glow and still be too weak to operate the valve correctly. Because gas-appliance diagnosis carries additional safety considerations, professional service is often appropriate.
Temperature Sensor
The oven temperature sensor sends temperature information to the control system. A defective sensor or damaged sensor circuit can contribute to inaccurate temperatures, fault codes, or irregular heating.
Electronic Control Board
The control board manages oven functions such as heating, timing, temperature regulation, and user inputs. Before replacing it, related components, wiring, power supply, and error-code information should be checked. Some replacement controls may require configuration according to the manufacturer’s instructions.
Touch Panel or User Interface
The touch panel allows the user to select cooking functions and settings. Symptoms of a failing interface can include unresponsive buttons, random inputs, missing display segments, or controls that work only intermittently.
Convection Fan Motor and Blade
The convection fan circulates air through the oven cavity. A damaged blade, worn motor, obstruction, or loose mounting hardware may cause noise or poor air movement. The fan cover should be installed correctly to support proper airflow and user safety.
Door Hinges and Hinge Receivers
Oven doors are heavy and often use spring-loaded hinges. Worn or damaged hinge components can prevent proper closure. Both sides should be inspected because uneven wear can place additional stress on the door and frame.
Door Gasket
The gasket helps control heat loss around the oven door. Some factory gaps are intentional, so the gasket should not be altered without consulting the service information. A torn, hardened, or displaced gasket may require replacement.
Thermal Fuse or High-Limit Thermostat
These safety components interrupt power when abnormal temperatures occur. If a thermal device has opened, the reason for overheating should be identified before the appliance is returned to service.
Oven Light Assembly
The oven light may stop working because of a failed appliance-rated bulb, damaged socket, wiring issue, door switch, or control problem. Only a bulb rated for the oven’s temperature and electrical requirements should be installed.
How to Find the Correct OEM Replacement Part
The most important information for finding a replacement part is the oven’s complete model number. On built-in ovens, the model tag may be located around the door frame, behind the door, along the side trim, near the lower vent, or inside an adjacent cabinet area. The exact location varies by manufacturer.
Record every letter, number, dash, and suffix shown on the tag. A small difference in the model number may indicate a different production series with different components. The serial number can also be helpful when a manufacturer made design changes during the model’s production period.
Once the model number has been located, use a model-specific parts diagram or search tool. Compare the original component with the product photos, terminal arrangement, dimensions, electrical rating, mounting style, and manufacturer notes. Appearance alone is not enough to confirm compatibility.
OEM replacement parts are produced for the specifications of supported appliance models. Correct fit and function still depend on selecting the exact part associated with the model and production information.
Preventative Maintenance Tips
- Clean spills after the oven cools. Food residue can smoke, create odors, and affect interior surfaces when repeatedly heated.
- Use self-cleaning cycles carefully. Follow the manufacturer’s instructions, remove required accessories, provide ventilation, and avoid running the cycle immediately before an important cooking event.
- Keep ventilation openings clear. Do not block the oven’s lower or upper vents with foil, towels, pans, or decorative trim.
- Avoid lining the oven floor with foil. Foil can trap heat, damage finishes, disrupt airflow, and interfere with temperature regulation.
- Do not use the door as a shelf. Placing heavy cookware on an open door can damage hinges, receivers, glass, and alignment.
- Inspect the gasket periodically. Look for loose sections, tearing, hardening, or food buildup without pulling or scrubbing aggressively.
- Listen for changes. New scraping, buzzing, rattling, or clicking sounds may indicate a loose fan blade, relay problem, or mechanical wear.
- Address error codes promptly. Record the code and operating conditions instead of repeatedly clearing the display without investigating the cause.
- Use suitable cookware. Correct pan size and placement promote airflow and more consistent cooking.
- Follow installation clearances. Proper cabinet openings, ventilation, electrical supply, and gas connections are essential for safe performance.
When to Call a Professional
Some basic checks can be performed without disassembling the appliance, but built-in oven repairs can become complex quickly. Electric models may contain 240-volt circuits even when individual controls appear inactive. Gas models include fuel connections and safety components that require appropriate tools and training.
Professional service is recommended when the breaker trips repeatedly, wiring appears burned, a gas odor is present, the oven overheats, the door glass is damaged, or live electrical testing is required. Service may also be the best choice when removing the oven from its cabinet is necessary. Built-in units can be heavy and may require more than one person to move safely.
Frequently Asked Questions
What is the difference between a built-in oven and a wall oven?
The terms are often used interchangeably. A wall oven is a type of built-in oven installed within cabinetry, usually at an elevated height. Some built-in models may also be installed below a counter.
Are built-in ovens available in both gas and electric models?
Yes. Electric built-in ovens are common, but gas models are also available. The correct choice depends on the kitchen’s utility connections, installation requirements, and cooking preferences.
Why does my built-in oven have power but not heat?
Possible causes include a partial power-supply interruption, failed heating element, weak igniter, open thermal fuse, sensor problem, control failure, or damaged wiring.
Why is my built-in oven taking so long to preheat?
Long preheat times may be caused by a weak heating component, damaged door seal, incorrect voltage, temperature-sensor issue, or a change in the oven’s operating mode.
How do I know whether my oven temperature is accurate?
Evaluate the temperature across several heating cycles using an appropriate oven thermometer. A single reading may be misleading because normal oven temperatures rise and fall as the heating system cycles.
Can I replace a built-in oven heating element myself?
Replacement may be manageable on some models, but the appliance must be disconnected from power and the correct procedure must be followed. Use professional service when wiring access, live testing, or oven removal is required.
Why is my convection fan making noise?
A noisy fan may have a loose blade, obstruction, worn motor, damaged bearing, loose cover, or contact between moving and stationary parts.
Should the convection fan run continuously?
Not necessarily. Fan operation varies by cooking mode and model. Some ovens cycle the fan or stop it when the door opens. Consult the owner’s manual for the expected sequence.
Why will my oven door not close all the way?
Common causes include worn hinges, damaged receivers, loose hardware, an incorrectly positioned gasket, bent door components, or an obstruction around the frame.
Can I use aluminum foil on the bottom of a built-in oven?
It is generally not recommended unless the manufacturer specifically permits it. Foil can trap heat, block airflow, damage the oven surface, and affect cooking performance.
Where can I find my built-in oven model number?
Check around the door frame, behind the open door, near the lower vent, along the side trim, or inside an adjacent cabinet. The exact location depends on the manufacturer and model.
How long should a built-in oven last?
Service life varies according to construction, usage, installation, maintenance, operating conditions, and repair history. Prompt attention to small problems can help prevent additional component damage.
Entities and Terms
- Built-in oven
- Wall oven
- Single oven
- Double oven
- Electric oven
- Gas oven
- Convection oven
- Bake element
- Broil element
- Oven igniter
- Temperature sensor
- Electronic control board
- User interface
- Convection fan motor
- Door hinge
- Hinge receiver
- Door gasket
- Thermal fuse
- High-limit thermostat
- Oven light assembly
- OEM replacement parts
Final Thoughts
A built-in oven can serve as both a practical cooking appliance and a central part of a kitchen’s design. Its elevated placement, flexible configuration, and advanced cooking modes make it attractive to homeowners who want performance without the appearance of a freestanding range.
When a problem develops, begin with the basics: confirm the settings, check the power supply, record error codes, inspect visible components, and pay attention to changes in heating or door operation. Accurate model information is essential when purchasing replacement components because parts that look similar may not function correctly in every oven.
From heating elements and temperature sensors to hinges, fans, lights, and electronic controls, Appliance Parts Group can help homeowners and service professionals identify the components needed to keep built-in ovens operating as intended.
This article was written by an AI program as part of a beta test by Appliance Parts Group to explore how artificial intelligence can help inform and educate our customers. Our goal is to use AI tools to provide clear, reliable information so you can make confident, well-informed purchasing decisions.